


Here's the final product:
Here's a video of the transformation.
Materials:
- 2 large boxes of different sizes (hint, sit them toghether to make sure they're the size and shape you want before you start cutting)
-various other boxes and pieces of cardboard
-5 large white paper plates
-5 small white paper plates
-4 empty toilet paper tolls
-4 empty paper towel rolls
-fun battery operated lights (I used 2 silver pumpkin lights from CVS and an under cabinet light strip from Walmart)
-duct tape
-spray paint - silver, red, blue, orange, yellow, black (we used tempera paint for the black)
-7 strips of elastic (exact lengths vary)
-4 nuts
-cardstock
-painters tape
-5 sheets silver adhesive vinyl (bonus if you have a vinyl cutting machine like Silhouette or Cricut)
-Hot glue gun and lots of hot glue sticks to go along with it


I started with a box that would serve as the "hood" of the truck. I cut out a section towards the back so that it would sit on his shoulders and so his back could be under it when he laid down to transform. Had my kiddo test it out for size.


Then I cut a little door that his head could poke through when he was in robot mode.


We lined all of the edges with duct tape. We did this to reinforce the areas, to make the door for his head open and close more smoothly, and to make it more comfortable.


Next we did the "cab" of the truck with a taller box. We just cut a space out of the front and back to allow his body to lay under it. Not pictured: we added a piece of cardboard across the bottom, since this would be covering his belly when he's standing. (You can see this later).


Next I cut pieces of a box to make the grill. I made it about the length of the front of the truck, but with tabs on the ends for the headlights. Then I did accordion folding to give it texture. I covered it in duct tape. (I might have been able to skip this step and just spray paint it, but this is what I did.)

To make the wheels we took some plain white paper plates - 2 large and 2 small. My son painted the plates black with tempera paint - the wheels were his primary contribution


For the "rims" I used more paper plates - 2 small and 2 large, and cut a spoke shape out of the bottom part of the plate so it would fit within the rim of the "tire" plates. Then I spray painted them and the grill silver (so yeah, probably didn't need to duct tape the grill). I hot glued the rims inside the tires as shown.

For the legs I made two rectangle pieces out of boxes. (I used my kid to size these, but forgot to take a picture before I painted them.) Then I spray painted the cab and the legs blue.

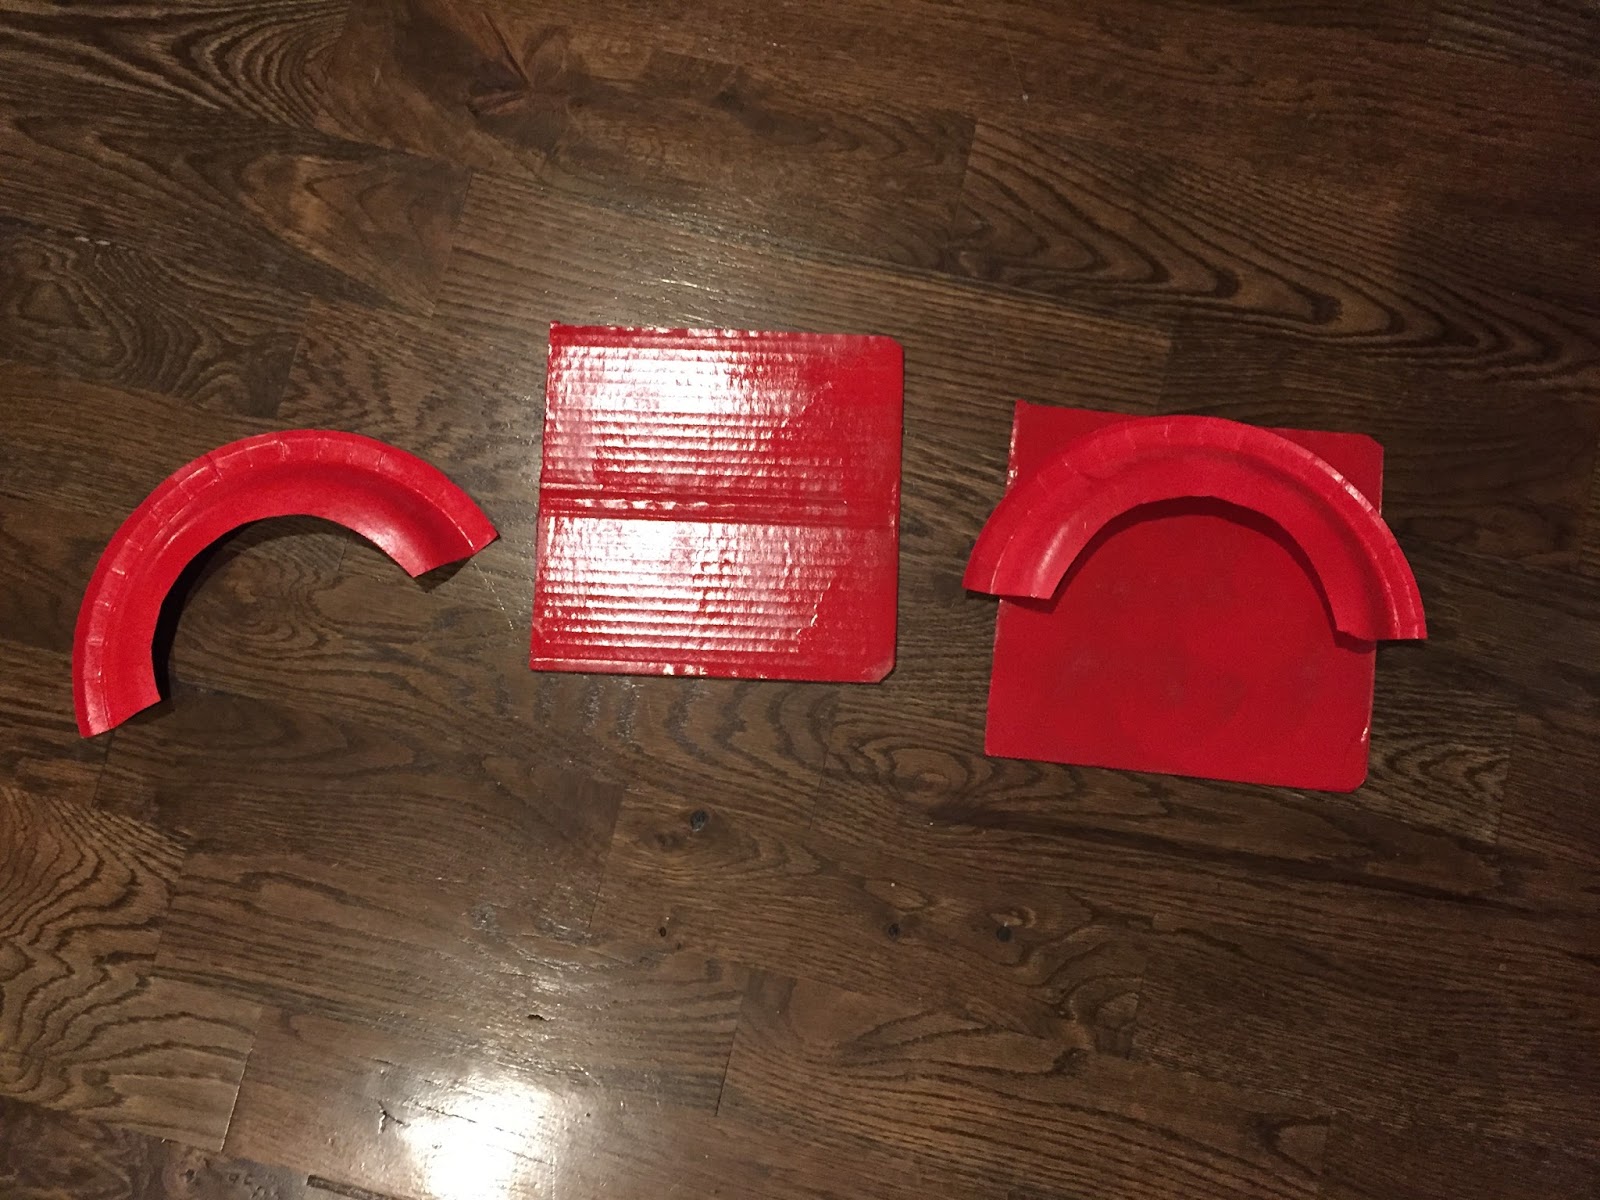
For the wheels, I made these out of white paper plates - 1 large plate cut in half and cut part of the center out, and 1 small plate just cut in half. Then I spray painted them red. Also not shown I cut 2 squares from boxes to use for the front wheels/hands (pictured later) and spray painted them red as well.

I spray painted the hood entirely red. Then I got some orange spray paint and painted about 2/3 of the front part on top of the red.

Then I spray painted the front 1/3 of the hood with yellow.

I cut some flame shapes out of cardstock to use as a stencil and taped it around the bottom of the legs.

Then I spray painted red.


Next I used the same flame carstic stencils and taped them to the hood. I taped them a little less than half way with the carstock flames pointing towards the front so that I could spray paint the front part blue.
I hot glued the larger wheel covers to the cardboard squares for the front tires.

On the legs, I hot glued the small wheels and wheel covers as shown so that a wheel would be on the outside of each leg.

I hot glued the grill to the front of the hood.


I purchased these battery operated lights from CVS. They had a button on the front to turn them off and on. I hot glued them to the tabs on the outside of the grill to serve as headlights.

To get the costume on, I used elastic. I think there's probably a better way to do this because the elastic made the costume bounce when he moved, but it worked overall. I measured it out with my kid to get the right fit and cut two pieces.

Then I had to put the straps on the cab so he could wear it around his hips. Getting the straps secure took some trial and error. I learned that hot glue didn't hold up enough. We ended up using a screen and scissors to make a hole through the duct tape enforced areas where we wanted to attach the elastic, then put a nut on the elastic and tied a knot on the end, this kept it from being pulled out of the hole. Did this for all four connection points.


Adjusted for size on the kiddo. Attached to the cab like suspenders. (this pic is when I was trying to use hot glue, before we threaded the elastic through the box. Criss-crossed in the back (this pic is when I was trying to use hot glue, before we threaded the elastic through the box)

I found that the hood didn't stay quite right, so I had to hot glue a piece of elastic to keep it in the right place on his body. It is glued high enough so he can lay under it and placed so he can get his head through the door, but without the box falling down around his shoulders when he did so. Basically this piece of elastic hung around the back of his neck when his head went through the door in standing mode.


I glued some strips of elastic to the back of the front wheel squares. He put his arms in these and held onto them.

Robot mode.


Now to get fancy. I had this under cabinet battery operated light I had purchased a while back from Walmart.

I cut some circles out of painters tape, using a toilet paper roll as a stencil. Then I placed them over the little light circles on the light strip.


I took 4 paper towel rolls - taping 2 sets of 2 together, and 4 toilet paper rolls and spray painted those and the under cabinet light (with painters tape circles) silver. I alsu cut a rectangular strip of cardboard and spray painted that silver to serve as a sort of visor over the top of the cab.


Then I did a LOT of hot gluing. I hot glued the visor to the top of the cab, over hanging the front a bit. And I hot glued the under cabinet light to the top, with lights facing forwards. I used lots of hot glue, gluing in the creases to make sure this was sturdy.


I glued the long papertowel rolls to the dies and the toilet paper rolls as shown. To make the windows I had some silver adhesive vinyl and I just cut out some rectangles with scissors - two for the sides and two for the front.

I used my SIlhouette Cameo to cut a Transformer shape out of silver adhesive vinyl to put on the front/bottom of the cab - the part that is on the stomach in robot mode.
And there you have it!
