Saturday, October 31, 2015

Pac Man Costume Tutorial


One very undeniably suburban thing about me is that I happen to be somewhat crafty and I don't pretend to deny that. Every year I make my kids costumes. Outside of the Royals in the playoffs or a good Wildcat football season, it's probably the highlight of my fall. My husband keeps warning me that some day my son is going to refuse to take my costume "suggestion" and will insist on a store bought super hero. I haven't lost him yet. When I suggested Pac Man, and his baby sister could be a ghost, and they can chase each other, he was so excited he asked if he could have his costume right then. And then he encouraged me through the process to get to work so he could play with his costume. I found some cardboard and foam board tutorials, but I decided to try using foam. Glad I did! It isn't too uncomfortable and as he likes to pretend to eat people and run into things it's definitely safe and durable for a 5 year old to wear and play with. Since I didn't find any others using foam I thought I'd try my hand at posting a tutorial. Note, using foam is more costly than cardboard, but I think it was worth it.

I ended up buying 2 of these pre-packaged 22"x22"x2" foam squares for the circle parts. Then I bought a yard of 1" foam for the middle.


First I cut circles out of the square pieces utilizing the full width of the square.  For the mouth I cut out from center a little bit to make sure there was room for my boy inside.


After cutting out the mouth, I did the arm holes. I held it up to my son and marked where his arms should go. Then I cut out a circle in that general area. I tried to make sure to leave enough foam at the top to be sturdy, but not to bury my son's head inside.

I did the same on the second square to make the other side of Pac Man. Next I took the long piece and cut it in half.


Then I busted out the hot glue gun for some serious Pac Man assembling. I glued the long pieces on top of one Pac Man side. I was concerned Pac Man wouldn't be tall enough song was sure to add the middle part so that it overlapped the circle sides. This added a little more height and also made sure it was a nice round circle instead of the jagged edges I cut.


When the first piece was done I marked where the head hole should be


When the first one ran out I glued the second long piece in place and cut it to length. 


Then I cut the head hole and the bottom. I used my son to figure out how big to make these.


Then I hot glued the other side of Pac Man on.

And then cut out the mouth pieces from the excess 1" foam. I measured my Pac Mand mouth space and cut to size.


Then I cut out and glued the mouth pieces into place.


Once Pac Man was glued together (and several times I had to ward off my sons attempts to jump on it), it was time to make Pac Man yellow.  I used yellow felt. I bought WAY more than I needed so I'm not sure how much you actually need, but enough to cover Pac Man. I traced around Pac Man leaving about a couple inches margin. No need to be exact, just need enough margin to overlap a bit. 


Do this for both sides. Then get some spray adhesive.

And spray glue the yellow felt on the sides. (This can be messy and make surrounding areas a little tacky - I did mine outside.)


Next I cut the arm holes like this. Then I spray glued the triangles into the hole, but maybe you can skip spray gluing these and just hot glue them. I ended up needing to hot glue these down due to sliding arms in and out - the spray adhesive wasn't cutting it on these.


Spray glue the center strip too. The cut the bottom area out. I did it again with slits and glued the remainder inside so it wrapped a little. Again probably hot glue these wrap pieces.


Do the same with the head hole and hot glue.


Now Pac Man needs some black felt inside his mouth. I measured what I needed and cut the black felt slightly smaller to leave some yellow around the edges.  I spray glued it, but ended up having to hot glue the edges because it was coming off. (Apparently I forgot to take a pic of this step, but it's not difficult).

And finally Pac Man's eyes. I found varying eye shapes online, but decided to go with the smaller Pac Man shape because it was the easiest. I used a cup to draw the circle and then cut a wedge out. I hot glued the eye to both sides and then Pac Man was complete.


And there you have a fun soft foam Pac Man. My son loved this costume. He put it on about every other day until Halloween (and I'm sure it won't stop there). Though his little sister didn't quite chase him as much as he wanted, he did try "eating" everything in site.


Sunday, October 18, 2015

First Birthday a la Ballet

I previously posted about how I love throwing kid parties.  I can't help it. It's the suburban crafter in me.  I may have considered Vera's gender reveal party to be her first party, but here is the real deal. Vera's first birthday party.
 
Since I project my love for dance upon my infant by pretending she's already a ballerina and I have some good tutu pics, by default she ended up with a ballet birthday.
 
 
I made this little high chair tutu for the big moment. At first she had no idea what to do with the cake, but after some encouragement, she dug into the icing.  Girl knows the good stuff.  She also loves fruit, so I made some little toppers thanks to my Silhouette and some glitter cardstock and put them on toothpicks and fancied up the fruit a little.
 
 
Rather than attempting the cake (I don't really do anything that involves the kitchen), I ordered a little pink cake with pearls and cupcakes and added some more of the toppers I made.

 
As party favors I had mini square prints and stickers of her one year photo shoot and also rock candy for the kiddos.  I ordered the Minisquares and stickers as well as some Mighty Prints I displayed from Social Print Studio http://www.socialprintstudio.com/ . They have some cool products and their prints and squares are printed on a thick cardstock that is just generally awesome.  I had lots of party attendees asking where I got the prints, so I thought I would post a shout out to SPS.

 
I wanted to do something fun as a memento from her party, so I bought a pink leather notebook and had everyone write a little note to her. I plan to give it to her when she turns 16 as something fun to look through and that she can use when she's older to write her masterpieces after all the love in the front of it.


Since I took all of her monthly pics with tutus, I had to put together a little month-by-month arrangement as part of the décor.
 
From all of the outtakes, I found wiggly baby moments that actually look like she's executing fantastic ballet moves and made this poster.
 
 
To show off some of her cute 1 yr pics, I made a little ribbon garland and used clothespins to display the pics for the party (these are Mighty Prints from SPS above).
 
 
Overall it was a successful party, full of cuteness and lots of love.

Tuesday, November 11, 2014

Harvery

I have always been someone who likes quirky cars.  My first car was a 1987 VW Golf.  Her name
was Patty and I loved her.  I loved her hatchback, I loved her crank sunroof, and I even loved when there was a short in the horn causing it to honk every time I turned the wheel.  Well, unless I was searching for a parking spot at the college dorms.  That was embarrassing. I said the only way I'd ever get rid of Patty is for a VW Cabrio.  So that's what happened.

Enter Lilly.  My dad located this lavender Cabrio my freshman year in college.  I wasn't sure about the color at first.  I mean, I like quirky, but that seemed a little much. But after owning Lilly, I really grew to love her lavender-ness. I really loved everything about Lilly.  I still miss her, especially on beautiful sunny days.

I love driving and I have so many fond memories with my friends, or just driving alone with the sunroof or top down, music blaring, and enjoying life. I really bonded with my cars and felt like they were an extension of me. So when I got married and we decided we needed something bigger and more reliable it was pretty rough. When we asked about trading in Lilly they said they'd scrap her. This was my dearest friend and I couldn't bear it, so we found a young girl who bought her for $500. At least I know she'd bring a little happiness to someone else for a while.

Jane.  Jane was a Jeep Patriot.  Perhaps her name is indicative of how I felt from her from day one.  Plain Jane. She served her purpose, but she was nothing special. I compare Jane to a college roommate. We were brought together by circumstance; we got along just fine and even had a few good times, but let's be honest, when this period of life is over we're going our separate ways and probably won't really keep in touch.

When Jane started showing her age (or her cheapness), it was time to consider what to do next. Like many a former VW fan I had turned my eyes on the Mini Cooper, but that doesn't necessarily fit the suburban mom lifestyle. I had just had a baby and it would make sense to size up as we were now a family of five, so I looked at all kinds of options that had third row seating. I had convinced myself that the benefits of the extra seating would be worth driving a very suburban SUV. You know, the kind with all the attributes of a van while refusing to actually be a van. I even test drove one.  But then I thought I'd test drive a Mini just to see if we could fit. Any you know what... Mini must know about suburban moms in denial. They made the Countryman just for us.  It has four doors, it seats 5, I could even fit the stroller in the back, but it still has all the character of a Mini. When we test drove it, they handed me the keys and said, "Take your husband. Put the car seats in and take your kids." So we did.  We all went for a test drive and I fell in love. I'll save you the details that followed, but suffice it to say, I ended up with Harvey. 

Harvey is everything I would want in a car. The kids love Harvey because he's fun and my husband loves Harvey because he's fun to drive. We have taken him on trips to Oklahoma with all five of us with no complaints. Yes, it's good to be in denial. So, to the "not a van" SUV that I probably should be driving, we will talk again in a few years. For now, it's me and Harvey (and the kids in the back seat) and I couldn't be happier.

Friday, November 7, 2014

My Love Affair With Free Shipping

As a busy mom with a full-time job time is my most precious resource.  While I still like to indulge in the material goodie now and then I don't really "go" shopping anymore as stores are really only open during my prime work and family times. If I can't get it at my Target during my 2 hour long post-bedtime grocery run, then I get it online.  Pretty much, that's how it works. 


Free shipping is something that I'm starting to demand.  I very rarely buy ANYTHING that costs more than $20, so I'm hardly ever willing to tack on a $5.99 shipping charge. I accidentally became an Amazon Prime member recently (forgot to cancel my trial subscription).  While I'm still not sure it's worth the price I've decided that since I paid it anyway I'm going to take full advantage.  But while Amazon has pretty much everything, it isn't always the cheapest and I'm a huge bargain hound.  So when shopping around free shipping is a must in order to beat Amazon's prices.  So I thought I'd share my favorite free shipping tips:


Target RedCard debit card (which is the greatest thing ever) is tied to your checking account so you don't have to worry about running up credit.  It saves you 5% off all purchases in the store AND online (and even on Target Ticket which I haven't yet fully explored).  In addition, you get Free Shipping on all online orders. So by the time you factor in a 5% discount and free shipping, they are pretty competitive with Amazon stuff.  Oh, and it doesn't cost me $99 a year for this benefit. As an additional perk you can register your card and select a K-12 school and Target will donate 1% of your purchases to that school. (Here if you have a card and need to do this).  As someone who (almost) always says no to store credit cards, I was on a Christmas shopping spree and I heard the clerk mention it was a debit card and I finally listened... and am so glad I did. Target, I love you! (How suburban is what I just said?!)  Amazon and Google may be trying to take over the world, but I'll bet Target could actually do it if they wanted to.  And I'd follow like a little sheep.


ShopRunner One of my new loves is ShopRunner.  They are a subscription service that offers free two day shipping through several different stores.  While I'm not sold on paying for free shipping, if you have an American Express card you can sign up for this service for FREE!  Truly free 2-day shipping!  Yes Victoria, there is a Santa Claus and he delivers gifts to your door year-round. :)  And, for those of you who avoid buying on credit, you don't have to actually use your AmEx card to pay, you just have to have a card to get the perk of free membership then you can checkout with whatever form of payment you want.


They have a decent list of partners. I've used it for American Eagle, Delia's, Babies R Us, and Lord & Taylor, but they also include Nine West, Newegg, Tiger Direct, Radio Shack, and a bunch of other places.  Free shipping for free... the way I dreamed it would be.


Amazon.  You can pay the $99 to get free shipping on Prime items with the additional perks of video streaming, music streaming, and the like.  If you use these services or have a Kindle and live an Apple-free life it might be worth it.  I'm still undecided about paying for free shipping.  I'll re-evaluate next fall.  But even without Prime, some items do ship for free, you just have to pay attention to the shipping method and charges.


Of course other stores occasionally offer free shipping and many offer free shipping for orders over $x so you just have to hunt and wait.  But if you're looking for a random halogen light bulb, baby bottles, a certain item for a gift (all of which I've done in the last week) or things like that, it's nice to be able to shop around and just get what you need... from your bed in your PJs and have it delivered to your door for free... but that's just my opinion.

Saturday, May 31, 2014

Undeniably Suburban DIY Nursery

So, baby Vera is at max just over 2 weeks away and I've had lots of fun decorating the nursery.  I did most of it DIY, which is pretty suburban, but what can I say, I'm crafty.  I feel a little bad because I did so much for her nursery and for my son's nursery a few years ago I just painted the room and slapped a couple pics on the wall, but oh well.  It was fun.  Also, I have a tendacy to under-decorate and to not put too much on the walls, but in this room I went a little crazy.  Here's a run down on the projects I did in her room and links to the tutorials I used. 
 
 
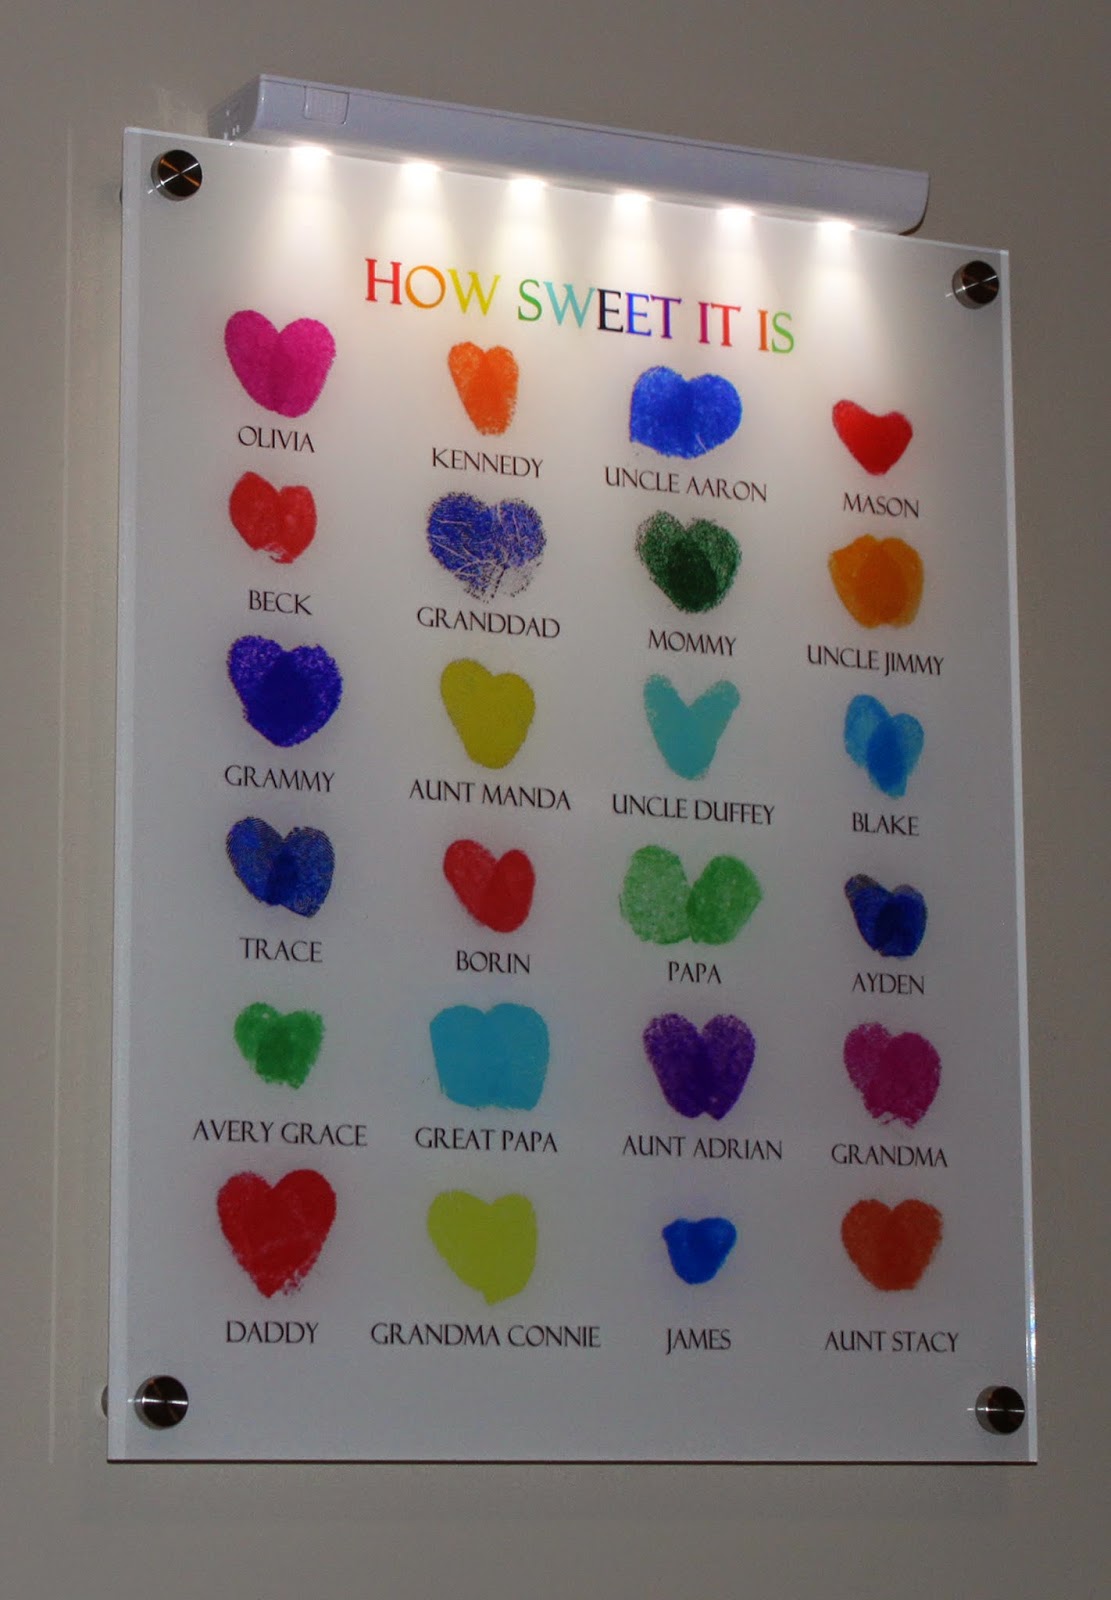
THUMBPRINT HEART WALL ART
 
My main idea for the nursery was to collect thumbprint hearts from our family and then have a poster or something made from them.  I figured I could do them in different colors (thanks Photoshop) and then decorate the room with bright colors. That was the main idea and inspiration for her room.

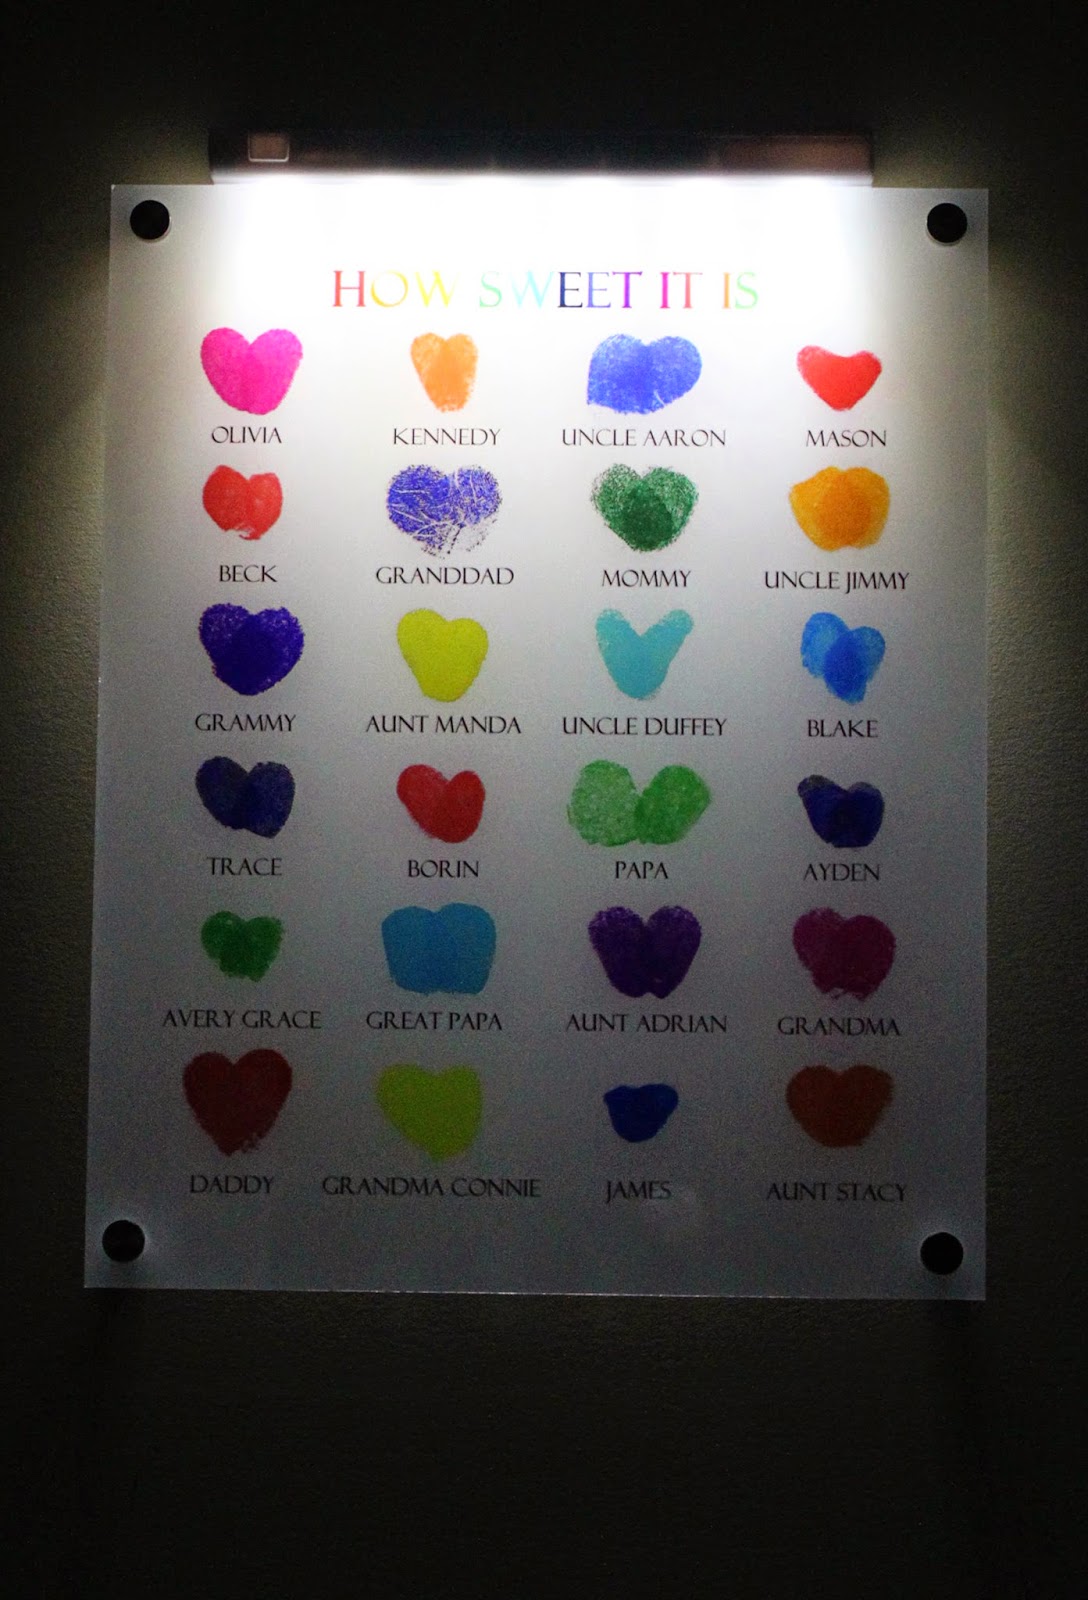
I loved the idea of having something so personal from her family and I love that thumbprints represent how we are all unique and that the hearts are all a little different and imperfect, but come together so well.  I collected the thumbprint hearts from our helpful family and arranged it all in Photoshop.  I was going to get a mounted print of some kind, then found that Snapfish offered acrylic and had a coupon so I went with it and... I love it! 

As an added bonus, I thought it might be cool to somehow add some light to it since it was acrylic.  I found a battery powered under cabinet LED light strip for under $15 at Wal-Mart and it included a remote.  Score!  Perfect way to check on the baby without turning on bright lights and it looks kinda cool in the dark.  I'm sure there are better ways to light it, but quick, cheap, and remote... I'm satisfied.  And I literally just set it on top so I can take it down any time I want.


  VINYL AND BUNTINGS
 
I really wanted some sort of accent wall, but refused to paint since our house is less than a year old.  So I turned to my Silhouette and vinyl (okay, that sounded SUPER suburban).  I cut out lots of vinyl clouds and put them all over the wall as well as a little cut out with her name on it.  Also, I do tend to love fabric buntings so I used my stash of thrift store t-shirts from my Etsy days to make some pennants to create a couple of rainbow colored buntings.  Upcylced and colorful.  


 BEDDING AND CURTAINS
 
For the bedding I ordered some custom fabric from Spoonflower.com using just the thumbprint hearts of our little family (I didn't have time to wait for extended family on this one).  I liked the idea of her being surrounded by our thumbprint hearts and it turned out nice for the bumper.  Generally I found bedding tutorials here.  I struggled a little to find a good bumper tutorial because I wanted to do the full length of the crib and not use the 6 pack of bumper inserts you can buy at craft stores, so the main bumper tutorial I used was this one.  I  picked some other bright colors for the opposite side of the bumper, the ties, and the crib skirt. I bough the crib sheets because I didn't want to mess with that, and really, Target has cute, cheap sheets, so why entertain the hassle. 
I originally intended to buy curtains but I couldn't find what I wanted.  After exhausting my options, I decided I'd just make the curtains myself,  I couldn't find the wide striped fabric I had envisioned, so I just went with chevron (my apologies to Vera if this completely dates her room in the future since chevron is big in the 'burbs these days).  The main benefit of DIY-ing the curtains was that I was able to do black-out lining and ultimately it did save a few bucks. 
 
CHALKBOARD PAINT AND PHOTOSHOP
 
To go over the crib, I painted little wood plaques from the craft store with chalkboard paint and printed big versions of our family's thumbprint hearts, then put our names under it in chalk.  I also made this little print to put in the middle and found a nice bright yellow frame for it.  It turned out cuter than I thought it might.
 
 
 And when looking for a quote for her room, I saw one on Pintrest that used these lyrics from the John Mayer song, "Daughters."  It seemed pretty perfect for her colorful room and our undoubtedly colorful gal-to-be (plus we love John Mayer around here) so I had to do an extra quote and I put it on her dresser.


 FUN WITH CARDSTOCK 

 My son didn't have a mobile in his room because I wasn't crazy about the ones in the store, but once I saw some cool versions online I decided that Vera needs one.  I made this one (which is actually a no-sew) by stringing cardstock to embroidery hoops - based on this tutorial.  I don't trust it enough to put it over her crib, but I put it where she can look at it during diaper changes. I also have a love for paper garland, so I got a heart punch and made some colorful heart garland to hang. 


Saturday, February 8, 2014

Gender Reveal: The Party

Every good suburban mom likes to throw a party for her kids, and really, this is one thing I have never denied.  We had a little gender reveal party and I really view this as my baby's first party, even if it's still in my belly. :)  It was lots of fun.  We just had family over.  I had everyone take their pic at our little "photo booth" with either a mustache or lips for their predictions.  Then I Photoshopped this collage for the baby book.
I had these fun gender reveal confetti push pops.  I had really wanted some kind of confetti poppers and when I saw these on Etsy I thought they were great.  To make it even better, the ladies that run this Etsy shop live here in Johnson County, so I was able to arrange for local pick up and didn't have to pay for shipping.  (Here's their site: https://www.etsy.com/shop/genderreveal?ref=l2-shop-info-name.  They have a few other gender reveal items too.  Message them and they can probably set you up with local pick up.)

After a bit of a battle with a cranky 3 year old, we were finally able to get him to cooperate so we could all do the fun gender reveal together.  We all pushed our confetti revealers and the pink confetti went flying!  It's was lots of fun and a great way to share our news.  The little ones had some fun making angels in the confetti afterwards and it was actually quite a bit easier to clean up than I anticipated.  Overall, it was a great first party and a wonderful way to celebrate our girl with our family.


Monday, February 3, 2014

Undeniably a Gender-Finder-Outer

So, I'm pregnant and I have my sonogram this week and find out the gender (God willing).  There are definitely people who have different opinions about whether they want to find out.  This was never even a question with us.  Absolutely.  If I could find out the gender the moment I find out I'm pregnant, I would love it.

The main reason people from my camp tend to give is that they are "planners" and want to be prepared for the baby - decorate the nursery in a particular theme, buy clothes, etc.  Ok, I definitely feel this way, but I have friends in the "surprise" camp that identify as planners and certainly like to plan in other areas of their lives, so there has to be more to it.

Ultimately, I totally understand that people have different reasons for one or the other and I fully respect everyone's personal choices (though for my close friends that don't find out, I feel they do it just to stress me out).

So why am I adamant about wanting to know?  Here are my thoughts. First, the planning thing, definitely, but it's also a bit of a control issue.  I don't think I'm a super controlling person (or I wouldn't have married my rowdy Okie husband... there's no controlling that guy), but, well, I do like to be in control of my own life and know what is going to happen and prepare for it. It's one of my faults, I know.

The other thing I've realized is that most parents-to-be seem to be "miracle" people - those who from the day they find out they're pregnant see that it is all a miracle and are grateful for each bout of morning sickness and look forward to an all natural child birth.  I am not one of those people.  Wish I was, know I should be, but I'm just not. The first time I was pregnant I was terrified.  I was terrified of what being pregnant would be like, what this whole birth thing would entail, and whether I was up to parenting an infant.  Even with an easy pregnancy, I was probably more scared than excited.  It was all just weird to me.  As a result, I think it was harder for me to connect with "it" than it is for all those "miracle" people out there.  I read the books and got the emails to help me know what to expect, but those were even worse.  Learning that my baby was now covered in fur and cheese or that its ears were starting to move to the side of its head (ew, where were they before?) didn't really help the whole bonding thing and reading about all the gross and horrible things that could happen (as though child birth didn't sound horrible enough) was even more terrifying. 

However, finding out that this baby they said I had inside of me was a boy created a whole different feeling.  Now this was my son.  We could give him a name.  I could start imagining what he would be like.  I could talk about "him." I could get his nursery ready and buy clothes for my little boy.  It made it much easier for me to bond with my unborn child and to get excited about the whole thing.  He went from being this weird parasitic thing inside of me that after months of discomfort should eventually be a baby, to becoming my son... now it wasn't "it", it was Beck, and well, we were pretty tight from that point on.

I still feel like pregnancy and child birth are more the curse of Eve than a miracle, but ultimately, I love the outcome, so I'll bear your curse Eve in order to bring another precious little thing into the world and into our family.  Oh, but I am so thankful that modern technology lets me know if its a son or a daughter so I can get the kick-start I need.  So, here's to hoping this baby shows the goods at our sono!